

How to Create a Monthly Social Media Content Calendar
A simple, repeatable process to plan a month of social media posts: goals, content pillars, key dates, batching visuals with templates and reviewing results.
Table of Contents
Posting on social media without a plan usually ends the same way: a busy week, a last-minute caption and a feed that looks random. A monthly social media content calendar fixes that. It gives you one place to see what you will post, where and when, so you can create in batches, stay consistent and keep your brand looking professional.
In this guide we walk through a simple, repeatable process you can use every month, whether you run accounts for your own business or manage them for clients.
1. Why a monthly content calendar works
A monthly view is long enough to plan campaigns and short enough to stay flexible. It helps you:
- Stay consistent, because every slot is planned before the month starts.
- Balance your content mix instead of posting only promotions.
- Batch-create graphics and captions, which saves hours each week.
- Line up posts with launches, holidays and events in advance.
2. Set clear goals for the month
Before you fill in dates, decide what the month is for. Pick one or two goals, such as growing followers, driving website visits or promoting a new product. Every post you plan should support at least one of them. Write the goals at the top of your calendar so they stay visible while you plan.
3. Choose your platforms and posting frequency
You do not need to be everywhere. Focus on the platforms where your audience is most active and set a realistic frequency you can keep up. For many small businesses, three to five feed posts a week plus a few stories is a strong, sustainable starting point. Consistency matters more than volume.
4. Build content pillars
Content pillars are the three to five themes you post about again and again. They make planning faster and keep your feed balanced. A typical mix looks like this:
- Educate: tips, how-tos and quick tutorials.
- Inspire: examples, before-and-after shots and customer results.
- Connect: behind-the-scenes, team stories and questions for your audience.
- Promote: products, offers and announcements.
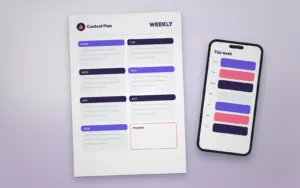
Assign each pillar a colour in your calendar. At a glance you will see whether one week is too promotional or too quiet.
5. Add key dates and campaigns first
Start by marking fixed dates: product launches, sales, events, holidays relevant to your audience and any awareness days that fit your brand. Plan the posts that lead up to them, such as teasers, countdowns and reminders, then fill the remaining slots with your pillar content.
6. Lay out the calendar
You can use a spreadsheet, a project board or a printed planner. Whatever you choose, include these columns for every post:
- Date and time
- Platform and format, for example feed post, carousel, reel or story
- Content pillar
- Topic and caption idea
- Visual or design needed
- Status: idea, in progress, scheduled or published
7. Batch-create your visuals with templates
Designing every graphic from scratch is where most calendars fall apart. Instead, set up a small library of on-brand templates for quotes, tips, announcements and promotions. Then change the text and images each time. Ready-made editable templates keep your colours and fonts consistent and turn a full afternoon of design into an hour. For campaign graphics, a bold promotional flyer design can be resized into a square post and a story in minutes.
8. Write captions and schedule ahead
Write captions in the same batching session. Keep a short hook in the first line, add value in the middle and finish with a clear call to action. Then schedule posts using the native tools of each platform or a scheduling app, so the month runs even on your busiest days.
9. Review results and improve
At the end of the month, look at which posts earned the most saves, shares, comments and clicks. Note the topics, formats and times that worked, and plan more of them next month. Your calendar becomes smarter every cycle.
10. Quick checklist
- One or two clear monthly goals
- Three to five content pillars with colours
- Key dates and campaigns added first
- Visuals created in one batch from templates
- Captions written and posts scheduled
- Results reviewed at month end
Ready to make content creation faster? Choose a plan and download the templates you need for your next month of posts.
Templates for this article
View all


About the Author
Templateza TeamWe share practical tips, design guides and resources to help you create professional templates for business, print and digital use.