
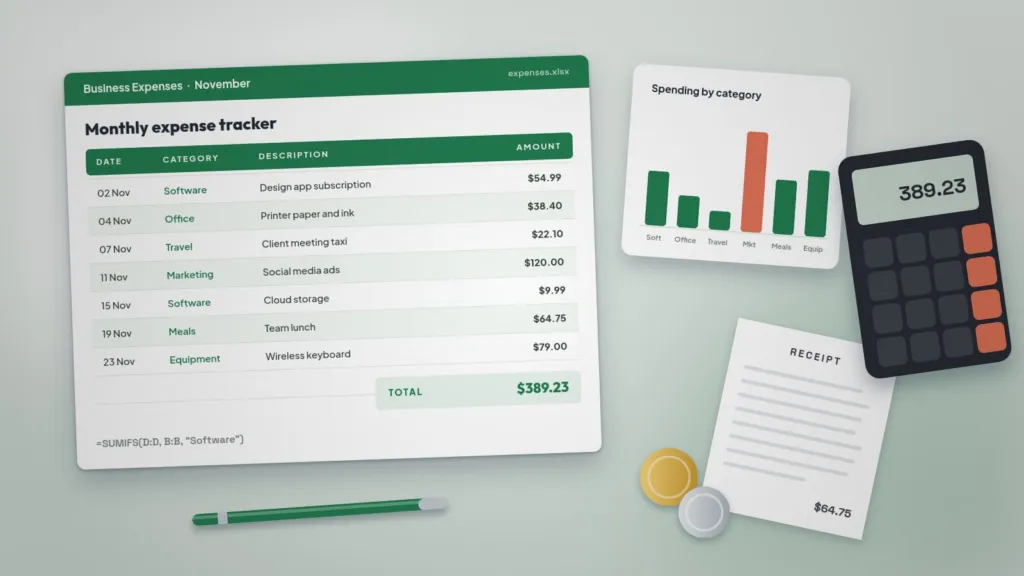
How to Track Business Expenses Using Excel Templates
Set up a simple Excel expense tracker with the right columns, category drop-downs, SUMIFS totals and charts, and keep your business records ready for tax time.
Table of Contents
Knowing exactly where your money goes is one of the simplest ways to protect your profit and stay ready for tax time. You do not need expensive accounting software to start. A well-organised Excel template can track every business expense, group costs by category and show your monthly totals automatically.
In this guide we show you how to set up an expense tracker that takes only a few minutes a week to maintain.
1. Why track business expenses
- See which categories cost the most and where you can save.
- Keep clean records for your accountant and tax returns.
- Know your real profit, not just your sales.
- Spot unused subscriptions and duplicate payments early.
2. Set up the right columns
Create a sheet with one row per expense and these columns:
- Date of the purchase
- Category, such as Software, Office, Travel, Marketing, Meals or Equipment
- Description of what you bought
- Amount
- Payment method, for example card, bank transfer or cash
- Receipt, a yes or no column or a link to a scanned copy
Select your data and press Ctrl + T to turn it into an Excel table. Tables expand automatically as you add rows and make filtering and sorting easy.
3. Use drop-down lists for categories
Consistent categories make your totals accurate. Create a short list of categories on a separate sheet, then use Data > Data Validation > List to turn the Category column into a drop-down. No more typos like “Sofware” splitting your totals.
4. Add automatic totals with formulas
A few formulas do most of the work:
- Total spend:
=SUM(D2:D500) - Total for one category:
=SUMIFS(D:D, B:B, "Software") - Total for one month:
=SUMIFS(D:D, A:A, ">="&DATE(2026,11,1), A:A, "<"&DATE(2026,12,1))
Build a small summary table with one row per category and a SUMIFS formula next to each. It updates instantly every time you add an expense.
5. Visualise spending with a chart
Select your summary table and insert a bar or column chart. Seeing your categories side by side makes it obvious where most of your budget goes. A PivotTable is another quick option if you want to group expenses by month and category without writing formulas.
6. Keep receipts organised
Scan or photograph receipts as soon as you get them and save them in a folder named by month. Add the file name or a link in your Receipt column so you can find any proof of purchase in seconds.
7. Make it a weekly habit
Set a 10-minute reminder once a week to enter new expenses. Small, regular updates are much easier than sorting a shoebox of receipts at the end of the year. At month end, compare totals with your bank statement to make sure nothing is missing.
8. Pair your tracker with professional documents
Tracking expenses is only half of your paperwork. Send clear, branded invoices so you get paid on time with our Professional Invoice Template, and keep your pricing easy to share with a price list template. Explore more in Business Documents.
This article is general guidance only. For tax rules in your location, please speak to a qualified accountant.
Templates for this article
View all

About the Author
Templateza TeamWe share practical tips, design guides and resources to help you create professional templates for business, print and digital use.